📅 Schedule meetings with Rallly
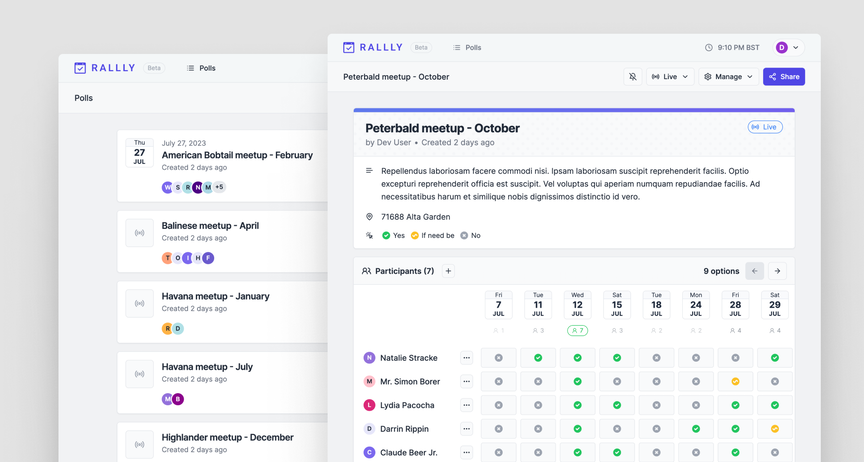
Rallly is a modern, open-source scheduling and collaboration tool designed to simplify the process of organizing meetings and events. By allowing users to create polls where participants can indicate their availability, Rallly helps groups find the most suitable date and time without the hassle of back-and-forth communications.
Features:
- Collaborative Scheduling: Create polls to gather availability from participants, streamlining the decision-making process
- User-Friendly Interface: Intuitive design ensures ease of use for both organizers and participants
- Self-Hosting Capability: Deploy Rallly on your own infrastructure to maintain control over your data
- Modern Tech Stack: Built with Next.js, Prisma, tRPC, and TailwindCSS for a robust and scalable application
Info
The project is open-source and can be downloaded here: https://github.com/lukevella/rallly.
📥 Installation
📋 Requirements
🐳 Install Rallly
The use of Docker Compose will automate the installation of rallly container.
🔧 Setup Rallly Parameters
Before deploying, you need to define a few environment variables that will be used throughout the setup process.
BASE_URL: public URL where the web service is accessibleHOST_PORT: external port used by NGINX to route traffic to the serviceALLOWED_EMAILS: comma separated list of email addresses that are allowed to register and loginSUPPORT_EMAIL: this email will be shown as the contact email for support queriesSMTP_HOST: address of the SMTP serverSMTP_USER: username for authenticating with the SMTP serverSMTP_PWD: password or app-specific token for SMTP authentication
# example of configuration for environment parameters
BASE_URL=https://schedule.domain.fr
HOST_PORT=10035
ALLOWED_EMAILS="xxx@gmail.com,yyy@outlook.com"
SUPPORT_EMAIL="zzz@gmail.com"
SMTP_HOST=smtp.gmail.com
SMTP_USER=user@gmail.com
SMTP_PWD="baoi lvyi cgev wzzq"
Getting Your Gmail SMTP Password
To send emails via Gmail SMTP, you'll need to generate an App Password, a special password used for third-party applications. Visit myaccount.google.com/apppasswords to create one. Use the generated password in the SMTP_PASSWORD field of your configuration.
⚙️ Configure Rallly for Docker Compose
Rallly can be deployed using Docker Compose.
The compose.yml file will automatically incorporate the environment variables configured in the previous step.
You can copy, paste, and run all of the following commands directly in your terminal.
# create docker directory
mkdir rallly && cd rallly
mkdir -p data/postgres-db
# setup of compose.yml
tee compose.yml > /dev/null <<EOF
services:
  rallly:
    image: rallly-selfhosted
    container_name: rallly-server
    environment:
      - NEXT_PUBLIC_BASE_URL=\${BASE_URL}
      - SECRET_PASSWORD=\${SECRET_PASSWORD}
      - DATABASE_URL=postgres://\${PG_USERNAME}:\${PG_PASSWORD}@rallly-postgres:5432/\${PG_DATABASE}
      - ALLOWED_EMAILS=\${ALLOWED_EMAILS}
      - SUPPORT_EMAIL=\${SUPPORT_EMAIL}
      - SMTP_HOST=\${SMTP_HOST}
      - SMTP_PORT=465
      - SMTP_SECURE=true
      - SMTP_USER=\${SMTP_USER}
      - SMTP_PWD=\${SMTP_PWD}
    ports:
      - \${HOST_PORT}:3000
    depends_on:
      rallly-postgres:
        condition: service_healthy
    healthcheck:
      test: ["CMD", "curl", "-fsS", "-o", "/dev/null", "http://localhost:3000/"]
      start_period: 60s
      start_interval: 5s
      interval: 60s
      timeout: 1s
      retries: 3
    restart: unless-stopped

  rallly-postgres:
    image: postgres:14-alpine
    container_name: rallly-postgres
    user: "\${PUID}:\${PGID}"
    volumes:
      - ./data/postgres-db:/var/lib/postgresql/data:rw
    environment:
      - POSTGRES_DB=\${PG_DATABASE}
      - POSTGRES_USER=\${PG_USERNAME}
      - POSTGRES_PASSWORD=\${PG_PASSWORD}
    healthcheck:
      test: ["CMD", "pg_isready", "-U", "\${PG_USERNAME}", "-d", "\${PG_DATABASE}"]
      start_period: 60s
      start_interval: 5s
      interval: 60s
      timeout: 1s
      retries: 3
    restart: unless-stopped
EOF
# setup of .env file
tee .env > /dev/null <<EOF
###################################################################################
# Run as non-root user
###################################################################################
PUID=`id -u`
PGID=`id -g`

###################################################################################
# NGINX Proxy Configuration
###################################################################################
HOST_PORT=${HOST_PORT}

###################################################################################
# Postgres Database Configuration
###################################################################################
PG_DATABASE=rallly
PG_USERNAME=rallly
PG_PASSWORD=`openssl rand -hex 16`

###################################################################################
# Rallly Generic Configuration
###################################################################################
BASE_URL=${BASE_URL}
SECRET_PASSWORD=`openssl rand -base64 32`
ALLOWED_EMAILS="${ALLOWED_EMAILS}"
SUPPORT_EMAIL="${SUPPORT_EMAIL}"

###################################################################################
# Rallly SMTP Configuration
###################################################################################
SMTP_HOST=${SMTP_HOST}
SMTP_USER=${SMTP_USER}
SMTP_PWD="${SMTP_PWD}"
EOF
Keep the .env file
All the secret informations will be stored in the .env file.
🐳 Build the Rallly Container with Docker
# increase swappiness to reduce OOM risk during build
sudo sysctl vm.swappiness=10
# create build directory for rallly
mkdir build && cd build
git clone https://github.com/lukevella/rallly.git .

# create the custom docker container
docker build \
  --build-arg SELF_HOSTED=true \
  -f ./apps/web/Dockerfile \
  -t rallly-selfhosted:latest \
  .

# remove build directory
cd .. && rm -rf build
# reset swappiness to prioritize RAM afterward
sudo sysctl vm.swappiness=0
🐳 Install Rallly with Docker Compose
Now that the compose.yml file has been generated, it's time to install all the containers.
# install and start the container
docker compose up -d
🚀 Deploy Rallly
Install NGINX
NGINX needs to be installed, follow the NGINX section.
Configure NGINX
NGINX needs to be configured using a file in /etc/nginx/sites-available directory.
This configuration file specify the documentation path:
server {
  server_name rallly.domain.fr;

  # setup 404 error_page
  error_page 404 /404.html;
  include snippets/error-404.conf;

  # reverse proxy
  location / {
    proxy_pass http://127.0.0.1:10035;

    # keep it HTTP/1.1
    proxy_http_version 1.1;

    # forwarded headers
    include proxy_params;
    proxy_set_header X-Forwarded-Host $host;
    proxy_set_header X-Forwarded-Port $server_port;
  }
}
# enable site for production
sudo ln -s /etc/nginx/sites-available/rallly.domain.fr /etc/nginx/sites-enabled/rallly.domain.fr

# restart nginx
sudo nginx -t && sudo service nginx restart
Replace
rallly.domain.frby the name of your website.
Activate HTTPS
To activate HTTPS protocol, follow the Let's Encrypt section.
⚙️ Configure Rallly
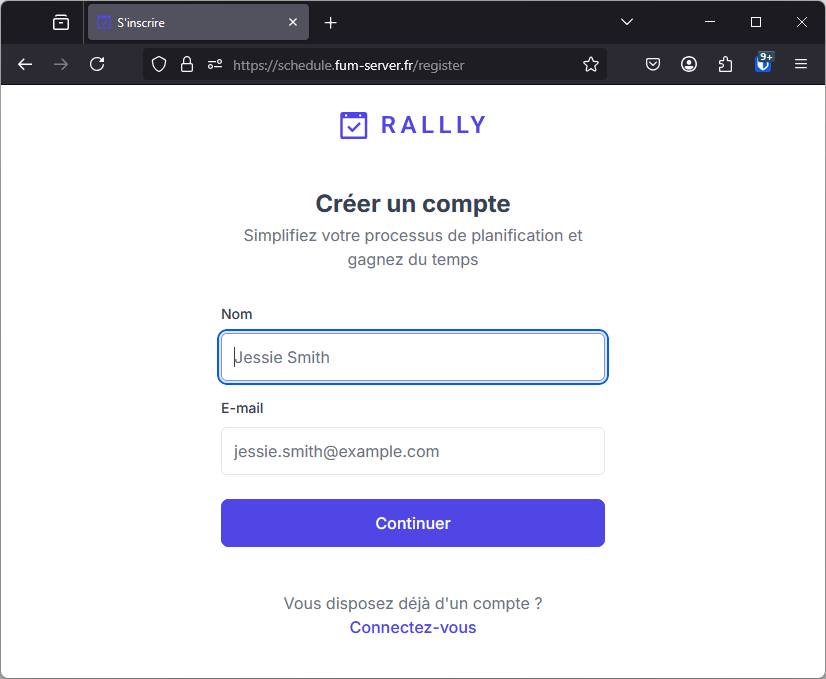
Register the Admin User
Only the allowed emails will be able to create account on Rallly.
Click on the Create Account button and proceed.