📸 Photos Server with Immich

Immich is an open-source high performance self-hosted photo and video backup solution. The backend is divided into several services, which are run as individual docker containers:
immich-server: handle and respond to REST API requestsimmich-postgres: persistent data storageimmich-redis: queue management for immich-microservices
Info
The project is open-source and can be downloaded here: https://github.com/immich-app/immich.
The immich-machine-learning docker won't be installed.
📥 Installation
📋 Requirements
🐳 Install Immich
The use of Docker Compose will automate the installation of immich container.
🔧 Setup Immich Parameters
Before deploying, you need to define a few environment variables that will be used throughout the setup process.
HOST_PORT: external port used by NGINX to route traffic to the service
# example of configuration for environment parameters
HOST_PORT=10015
⚙️ Configure Immich for Docker Compose
Immich can be deployed using Docker Compose.
The compose.yml file will automatically incorporate the environment variables configured in the previous step.
You can copy, paste, and run all of the following commands directly in your terminal.
# create docker directory
mkdir immich && cd immich
mkdir -p build data/immich data/postgres-db data/redis-db data/geocoding
# setup of Dockerfile
tee build/Dockerfile > /dev/null <<'EOF'
#############################################
# Stage 1: Patch Immich web UI bundle
#############################################
ARG IMMICH_VERSION=release
FROM ghcr.io/immich-app/immich-server:${IMMICH_VERSION} AS patch

# Patch /build/www/index.html by inserting the webmanifest link at line 16.
#
# Notes:
# - The inserted line becomes the new line 16.
RUN sed -i '16i\    <link rel="manifest" href="/app.webmanifest" />' /build/www/index.html

#############################################
# Stage 2: Final runtime image
#############################################
ARG IMMICH_VERSION
FROM ghcr.io/immich-app/immich-server:${IMMICH_VERSION}

# Copy the patched file from the patch stage into the final image
COPY --from=patch /build/www/index.html /build/www/index.html

# Disable any HEALTHCHECK inherited from the base image
HEALTHCHECK NONE
EOF
# setup of compose.yml
tee compose.yml > /dev/null <<'EOF'
services:
  immich-server:
    build:
      context: ./build
      args:
        - IMMICH_VERSION=${IMMICH_VERSION}
    image: immich-server:${IMMICH_VERSION}
    container_name: immich-server
    user: "${PUID}:${PGID}"
    volumes:
      - ./data/immich:/usr/src/app/upload:rw
      - /etc/localtime:/etc/localtime:ro
    environment:
      - REDIS_HOSTNAME=immich-redis
      - DB_HOSTNAME=immich-postgres
      - DB_USERNAME=${PG_USERNAME}
      - DB_PASSWORD=${PG_PASSWORD}
      - MACHINE_LEARNING_MODEL_TTL_POLL_S=${MACHINE_LEARNING_MODEL_TTL_POLL_S}
      - MACHINE_LEARNING_REQUEST_THREADS=${MACHINE_LEARNING_REQUEST_THREADS}
    ports:
      - ${HOST_PORT}:2283
    depends_on:
      immich-redis:
        condition: service_healthy
      immich-postgres:
        condition: service_healthy
    healthcheck:
      test: ["CMD", "curl", "-fsS", "-o", "/dev/null", "http://localhost:2283/"]
      start_period: 180s
      start_interval: 5s
      interval: 60s
      timeout: 1s
      retries: 3
    restart: unless-stopped

  immich-redis:
    image: docker.io/redis:6.2-alpine
    container_name: immich-redis
    user: "${PUID}:${PGID}"
    volumes:
      - ./data/redis-db:/data:rw
    healthcheck:
      test: ["CMD", "redis-cli", "ping"]
      start_period: 30s
      start_interval: 5s
      interval: 60s
      timeout: 1s
      retries: 3
    restart: unless-stopped

  immich-postgres:
    image: ghcr.io/immich-app/postgres:14-vectorchord0.4.3-pgvectors0.2.0
    container_name: immich-postgres
    volumes:
      - ./data/postgres-db:/var/lib/postgresql/data:rw
    environment:
      - POSTGRES_DB=${PG_DATABASE}
      - POSTGRES_USER=${PG_USERNAME}
      - POSTGRES_PASSWORD=${PG_PASSWORD}
      - POSTGRES_INITDB_ARGS=--data-checksums
    shm_size: 128mb
    healthcheck:
      test: ["CMD", "pg_isready", "-U", "${PG_USERNAME}", "-d", "${PG_DATABASE}"]
      start_period: 30s
      start_interval: 5s
      interval: 60s
      timeout: 1s
      retries: 3
    restart: unless-stopped
EOF
# setup of .env file
tee .env > /dev/null <<EOF
###################################################################################
# Run as non-root user
###################################################################################
PUID=$(id -u)
PGID=$(id -g)

###################################################################################
# NGINX Proxy Configuration
###################################################################################
HOST_PORT=${HOST_PORT}

###################################################################################
# Postgres Database Configuration
###################################################################################
PG_USERNAME=immich
PG_PASSWORD=$(openssl rand -hex 16)

###################################################################################
# Immich Configuration
###################################################################################
IMMICH_VERSION=release
MACHINE_LEARNING_MODEL_TTL_POLL_S=0
MACHINE_LEARNING_REQUEST_THREADS=0
EOF
Keep the .env file
All the secret informations will be stored in the .env file.
🐳 Install Immich with Docker Compose
Now that the compose.yml file has been generated, it's time to install all the containers.
# install and start the container
docker compose up --build -d
🚀 Deploy Immich
Install NGINX
NGINX needs to be installed, follow the NGINX section.
Configure NGINX
NGINX needs to be configured using a file in /etc/nginx/sites-enabled directory.
This configuration file specify the documentation path:
server {
  server_name immich.domain.fr;

  # setup 404 error_page
  error_page 404 /404.html;
  include snippets/error-404.conf;

  # reverse proxy
  location / {
    proxy_pass http://127.0.0.1:10015;

    # keep it HTTP/1.1
    proxy_http_version 1.1;

    # websocket support (required for real-time notifications)
    proxy_set_header Upgrade $http_upgrade;
    proxy_set_header Connection "upgrade";

    # forwarded headers
    include proxy_params;
    proxy_set_header X-Forwarded-Host $host;
    proxy_set_header X-Forwarded-Port $server_port;

    # application-specific tuning
    proxy_read_timeout 600s;
    proxy_send_timeout 600s;
    client_max_body_size 500M;
  }
}
# restart nginx
sudo nginx -t && sudo service nginx restart
Replace
immich.domain.frby the name of your website.
Activate HTTPS
To activate HTTPS protocol, follow the Let's Encrypt section.
⚙️ Configure Immich
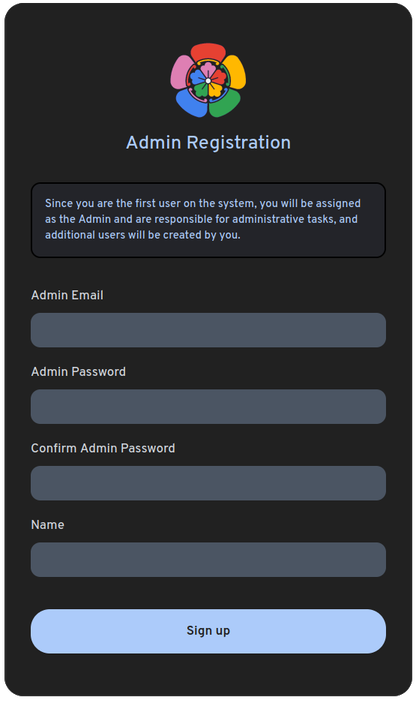
Register the Admin User
The first account created in the application automatically becomes the admin.
This admin account is responsible for creating and managing all other users.
To register the initial admin user, open the web interface at: https://immich.domain.fr