ODROID-C4 Hardware Platform
📟 Hardware
 ODROID-C4 is a new generation single board computer that is more energy efficient and faster performing than ODROID-C2 which was introduced over four years ago as the world’s first affordable ARM 64bit computer.
The main CPU of the ODROID-C4 is built with a quad-core Cortex-A55 cluster with a new generation Mali-G31 GPU. The A55 cores run at 2.0Ghz without thermal throttling using the stock heat sink allowing a robust and quiet computer. The CPU multi-core performance is around 40% faster, and the system DRAM performance is 50% faster than the ODROID-C2.
| Type | Description |
|---|---|
| Processor | Amlogic S905X3 SoC - 4 x ARM® Cortex®-A55 2.0GHz |
| GPU | 4 x ARM® Mali-G31™ 650MHz |
| RAM | 4GB 32bit DDR4 |
| Flash Storage | Micro-SD UHS-I SDR104 or eMMC storage option |
| USB3.0 Host | 4 Ports |
| Networking | Gigabit Ethernet (10/100/1000 Mbit/s) |
| Expansion I/O | 40pin GPIOs + 7pin I2S |
| Power | 12V/2A - Stress: 3.64W - Idle: 0.18W |
| Dimensions | 85 x 56mm |
| Weight | 59g |
Tip
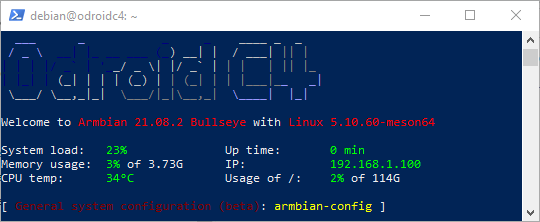
This website is hosted on the ODROID-C4 configured with a debian operating system.
The following documentation has been made with MkDocs.
GPIO

💿 Installing Debian

![]() armbian is a free and open-source operating-system based on the debian linux system.
An operating-system is the set of basic programs and utilities that make a computer run.
Using armbian/debian on the odroid allows the access of thousands of cross-compiled packages for arm device.
armbian is a free and open-source operating-system based on the debian linux system.
An operating-system is the set of basic programs and utilities that make a computer run.
Using armbian/debian on the odroid allows the access of thousands of cross-compiled packages for arm device.
A ssh server is installed by default in this release.
🛠️ Installation
Download Trixie image
The first operation consists on downloading the armbian linux image and flashing it on eMMC.
Download the Trixie linux image for ODROID-C4 https://www.armbian.com/odroid-c4.
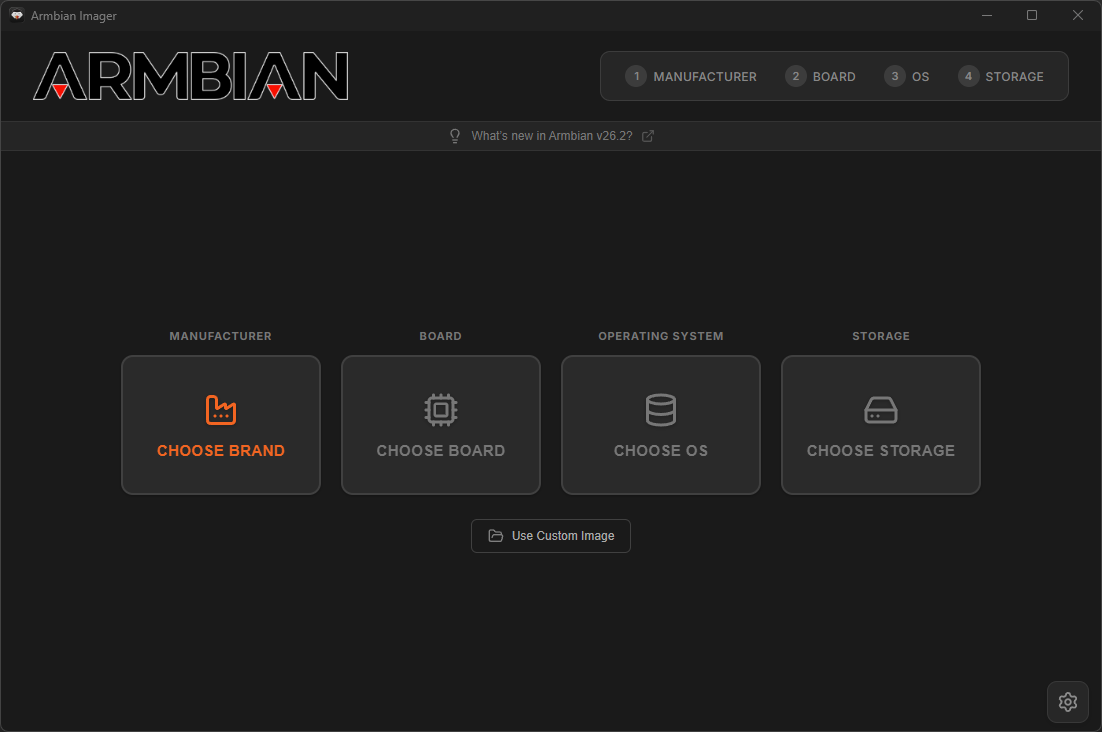
Flash Trixie image using Armbian Imager
Flash the Armbian_26.2.1_Odroidc4_trixie_current_6.18.8_minimal.img on the eMMC using Armbian Imager.
Click on Use Custom Image
🔐 Login
Login on armbian
Login using ssh with user: root, password: 1234 on ip: <device-ip>:
ssh root@<device-ip>`
- Set a new root password
- Create a new user (e.g.
debian) - Set the user password
- Enter the full name (e.g.
Debian) - Configure locale: skip
Add debian user account to sudo group if necessary
During the first connection on the odroid system a new user account will be created.
If this is not the case you will have to manually create a user account:
# add new user: debian
apt-get install sudo
sudo adduser debian
sudo usermod -aG sudo debian
⚙️ System Configuration
Configure Environment
To setup debian for the ODROID-C4, follow those steps.
# update system
sudo apt-get clean
sudo rm -rf /var/lib/apt/lists/*
sudo apt-get update --allow-releaseinfo-change
sudo apt-get upgrade

# update linux kernel
sudo apt-get dist-upgrade
sudo apt-get autoremove --purge
sudo apt-get clean

# disable armbian logging services
sudo systemctl disable armbian-ramlog.service
sudo systemctl disable armbian-zram-config.service
sudo sed -i 's/ENABLED=true/ENABLED=false/g' /etc/default/armbian-ramlog
sudo rm /etc/cron.d/armbian-truncate-logs
sudo rm /etc/cron.daily/armbian-ram-logging

# force cpufreq governor to schedutil
sudo sed -i 's/ENABLE=.*/ENABLE=true/g' /etc/default/cpufrequtils
sudo sed -i 's/GOVERNOR=.*/GOVERNOR=schedutil/g' /etc/default/cpufrequtils

# set hostname manually
sudo hostnamectl set-hostname odroid

# configure sshd daemon
sudo sed -i 's/#*MaxAuthTries [0-9].*/MaxAuthTries 3/g' /etc/ssh/sshd_config    # limit failed authentication attempts per connection to 3
sudo sed -i 's/#LoginGraceTime 2m/LoginGraceTime 20s/g' /etc/ssh/sshd_config    # allow only 20 seconds for a client to authenticate before disconnecting
sudo sed -i 's/X11Forwarding yes/X11Forwarding no/g' /etc/ssh/sshd_config       # disable X11 forwarding to reduce attack surface
sudo systemctl reload ssh

# reboot
sync
sudo reboot now
Install telnet
To access the debian board in case sshd crashes, telnetd will be installed.
LAN-only access
Telnet transmits data in plaintext, including passwords. It is only acceptable as an emergency fallback on a trusted LAN. Ensure port 23/tcp is never forwarded on your internet router.
# install telnet daemon
sudo apt-get install telnetd

# TCP wrappers: allow SSH from anywhere and telnet from LAN only
# (sshd on modern Debian ignores hosts.* but add it as a safety net)
echo 'sshd: ALL' | sudo tee -a /etc/hosts.allow
echo 'telnetd: 192.168.1.0/255.255.255.0' | sudo tee -a /etc/hosts.allow

# deny everything not explicitly allowed above
echo 'ALL: ALL' | sudo tee -a /etc/hosts.deny
Tip
To access the odroid device via telnet: telnet <device-ip>.
Install SSH Keys
The following procedure install ssh security keys from the client (ex: Windows) to the remote computer in order to login without the need of password.
# on desktop - Ed25519 is the recommended algorithm
ssh-keygen -t ed25519
Define host/port/user parameters
REMOTE_HOST="host"  # ex: dyndns.domain.fr
REMOTE_PORT="port"  # ex: 22
REMOTE_USER="user"  # ex: debian
$env:REMOTE_HOST="host"  # ex: dyndns.domain.fr
$env:REMOTE_PORT="port"  # ex: 22
$env:REMOTE_USER="user"  # ex: debian
Append local public key to remote computer
# verify both vars are set; otherwise print an error and exit
[ -n "$REMOTE_HOST" ] && [ -n "$REMOTE_PORT" ] && [ -n "$REMOTE_USER" ] || { echo "Error: set REMOTE_HOST, REMOTE_PORT, REMOTE_USER"; return 1 2>/dev/null || exit 1; }

# append local public key to remote authorized_keys (preserves existing entries)
ssh -p "$REMOTE_PORT" "$REMOTE_USER@$REMOTE_HOST" "mkdir -p ~/.ssh && chmod 700 ~/.ssh"
cat "$HOME/.ssh/id_ed25519.pub" | ssh -p "$REMOTE_PORT" "$REMOTE_USER@$REMOTE_HOST" "cat >> ~/.ssh/authorized_keys"
ssh -p "$REMOTE_PORT" "$REMOTE_USER@$REMOTE_HOST" "chmod 600 ~/.ssh/authorized_keys"
# verify both vars are set; otherwise print an error and exit
if (-not $env:REMOTE_HOST -or -not $env:REMOTE_PORT -or -not $env:REMOTE_USER) { Write-Error "Error: set REMOTE_HOST, REMOTE_PORT, REMOTE_USER"; return }

# append local public key to remote authorized_keys (preserves existing entries)
ssh -p $env:REMOTE_PORT "$($env:REMOTE_USER)@$($env:REMOTE_HOST)" "mkdir -p ~/.ssh && chmod 700 ~/.ssh"
Get-Content "$env:USERPROFILE\.ssh\id_ed25519.pub" | ssh -p $env:REMOTE_PORT "$($env:REMOTE_USER)@$($env:REMOTE_HOST)" "cat >> ~/.ssh/authorized_keys"
ssh -p $env:REMOTE_PORT "$($env:REMOTE_USER)@$($env:REMOTE_HOST)" "chmod 600 ~/.ssh/authorized_keys"
Info
It's now possible to login without entering password using ssh -p <port> <user>@<host>
Configure Firewall (ufw)
The goal of a firewall on Linux is to control and manage network traffic based on predetermined security rules. It acts as a barrier between a trusted internal network and untrusted external networks, such as the internet.
Install ufw Firewall
ufw is a straightforward command-line tool that manages iptables configurations, the core firewall infrastructure of Linux.
Docker also interacts with these iptables rules, often overriding ufw settings and enforcing its own rules.
# install ufw firewall
sudo apt-get install ufw

# switch iptables backend to nftables for Docker/ufw compatibility
sudo update-alternatives --set iptables /usr/sbin/iptables-nft
sudo update-alternatives --set ip6tables /usr/sbin/ip6tables-nft
sudo iptables -L -n
Reset ufw and clear firewall state
The following commands fully reset the firewall by removing any stale or partially applied UFW and iptables rules.
This is useful after system upgrades or when UFW is in a corrupted or inconsistent state.
# stop services that may interfere with firewall rules
sudo systemctl stop docker            # stop Docker to prevent rule conflicts

# disable and reset UFW
sudo ufw disable                      # disable firewall to avoid conflicts during cleanup
sudo ufw reset                        # remove all UFW rules and configuration

# flush all existing iptables rules (IPv4 and IPv6)
sudo iptables -F                      # clear all IPv4 rules
sudo iptables -X                      # delete all custom IPv4 chains
sudo ip6tables -F                     # clear all IPv6 rules
sudo ip6tables -X                     # delete all custom IPv6 chains
Configuring ufw Firewall
The following commands will configure the Linux firewall.
# disable IPv6 support in UFW (workaround for ip6tables/logging rule errors)
sudo sed -i 's/^IPV6=yes/IPV6=no/' /etc/default/ufw

# clean ufw rules
sudo ufw disable                    # disable firewall before blocking connections => otherwise ssh will stop
sudo ufw reset                      # reset all firewall settings
sudo ufw default deny incoming      # deny all incoming connections by default
sudo ufw default allow outgoing     # allow all outgoing connections by default

# exposes ports of containers and hosts for specific port
sudo ufw allow 22/tcp               # allow ssh
sudo ufw allow 80/tcp               # allow http
sudo ufw allow 443/tcp              # allow https
sudo ufw allow 445/tcp              # allow samba
sudo ufw allow 1194/udp             # allow openvpn
sudo ufw allow from 192.168.1.0/24 to any port 23 proto tcp

# activate the new ufw rules
sudo ufw enable                     # enable the firewall with new rules
sudo ufw status verbose             # show firewall status

# start Docker service
sudo systemctl start docker
Docker and ufw
If you are using the Uncomplicated Firewall (ufw) alongside Docker, you may encounter situations where your Dockerized web applications remain accessible from the internet despite ufw settings. This issue arises because both ufw and Docker manipulate the same underlying iptables configurations, potentially leading to conflicting rules that expose Docker containers regardless of ufw's active state.
A recommended approach involves prioritizing the ufw rules over those of Docker. This can be accomplished using the following command lines:
# force ufw rules before docker's
sudo tee -a /etc/ufw/after.rules > /dev/null <<EOF
# Put Docker behind UFW
*filter
:DOCKER-USER - [0:0]
:ufw-user-input - [0:0]

-A DOCKER-USER -m conntrack --ctstate RELATED,ESTABLISHED -j ACCEPT
-A DOCKER-USER -m conntrack --ctstate INVALID -j DROP
-A DOCKER-USER -i eth0 -j ufw-user-input
-A DOCKER-USER -i eth0 -j DROP
COMMIT
EOF

# restart and reload ufw rules
sudo ufw reload
Protect Against Brute-Force Attacks (fail2ban)
Fail2ban is a lightweight intrusion prevention tool.
It monitors service logs (like SSH) and automatically bans IP addresses that show malicious signs, such as too many failed login attempts in a short time.
This prevents brute-force attacks from overwhelming your server with endless authentication attempts.
Install fail2ban
# install fail2ban
sudo apt-get install -y fail2ban
Configure fail2ban for SSH
# configure global fail2ban settings (applies to all jails)
sudo tee /etc/fail2ban/fail2ban.local > /dev/null <<EOF
[DEFAULT]
allowipv6 = auto
EOF

# configure a dedicated jail for SSH protection
sudo tee /etc/fail2ban/jail.local > /dev/null <<EOF
[sshd]
enabled   = true
port      = 22
logpath   = /var/log/auth.log
maxretry  = 3
findtime  = 10m
bantime   = 24h
ignoreip  = 127.0.0.1/8 ::1 192.168.0.0/16 10.0.0.0/8
EOF

# enable and start the service
sudo systemctl enable --now fail2ban

# check that the service is running
sudo systemctl status fail2ban
Verify and monitor bans
# show current status of the SSH jail (number of failures, active bans, etc.)
sudo fail2ban-client status sshd

# monitor authentication log for incoming attempts
sudo tail -n 25 /var/log/auth.log

# monitor fail2ban's own actions (bans, unbans, warnings)
sudo tail -n 25 /var/log/fail2ban.log
💾 Configure SSD
Detect SSD device
# detect device name
lsblk
*NAME         MAJ:MIN RM   SIZE RO TYPE MOUNTPOINT
sda            8:0    0 465.8G  0 disk
└─sda1         8:1    0 465.8G  0 part
mmcblk1      179:0    0 116.5G  0 disk
└─mmcblk1p1  179:1    0 115.3G  0 part /

# store device name
DEVICE=/dev/sda
Tip
The SSD device name here is: /dev/sda.
Format SSD in ext4
# install parted
sudo apt-get install parted

# check that device partition has been selected
[ -n "${DEVICE:-}" ] && [ -b "${DEVICE}" ] || { echo "Invalid or missing block device: ${DEVICE:-<empty>}"; exit 1; }

# print what is about to be formatted
lsblk -o NAME,SIZE,MODEL,SERIAL,TRAN "${DEVICE}"

# ask user to continue
read -r -p "⚠️  This will ERASE ALL DATA on ${DEVICE}. Type YES to continue: " CONFIRM
[ "${CONFIRM}" = "YES" ] || { echo "Aborted."; exit 1; }

# create a GPT partition table
sudo parted "${DEVICE}" --script -- mklabel gpt

# create ext4 partition that takes the whole space
sudo parted "${DEVICE}" --script -- mkpart primary ext4 0% 100%

# ensure kernel sees the new partition table
sudo partprobe "${DEVICE}" || true
sudo udevadm settle || true

# format partition to ext4
PART="${DEVICE}1"
[ -b "${PART}" ] || { echo "Partition not found: ${PART}"; exit 1; }
sudo mkfs.ext4 -F "${PART}"
sync

# verify the partition table
sudo parted "${DEVICE}" --script print
Tip
Set DEVICE with your SSD device name (ex: /dev/sda).
Mount SSD automatically
The following steps describe how to mount automatically the SSD using its UUID.
# install setfacl/getfacl packages
sudo apt-get install acl

# define mount point for the SSD
SSD_DIR=/media/ssd

# ensure SSD_DIR variable is defined and not empty
[ -n "${SSD_DIR:-}" ] || { echo "SSD_DIR is not defined"; exit 1; }

# display available partitions to help user choose
echo "Available partitions:"
lsblk -fp -o NAME,FSTYPE,SIZE,LABEL,UUID,MOUNTPOINT

# ask user which partition should be mounted automatically
read -r -p "Enter the partition to mount (example: /dev/sda1): " PART
[ -b "${PART}" ] || { echo "Not a valid block device: ${PART}"; exit 1; }

# ensure the filesystem is ext4
FSTYPE="$(sudo blkid -p -s TYPE -o value "${PART}" 2>/dev/null || true)"
[ -n "${FSTYPE}" ] || { echo "No filesystem detected on ${PART}"; exit 1; }
[ "${FSTYPE}" = "ext4" ] || { echo "Expected ext4, got ${FSTYPE} on ${PART}"; exit 1; }

# extract UUID of the selected partition
SSD_UUID="$(sudo blkid -s UUID -o value "${PART}")"
[ -n "${SSD_UUID}" ] || { echo "Could not read UUID for ${PART}"; exit 1; }

# create mount directory if it does not exist
sudo mkdir -p "${SSD_DIR}"

# refuse modification if UUID or mountpoint already exists in /etc/fstab
if grep -Eq "^[[:space:]]*UUID=${SSD_UUID}[[:space:]]" /etc/fstab || grep -Eq "[[:space:]]${SSD_DIR}[[:space:]]" /etc/fstab; then
  echo "An fstab entry for UUID=${SSD_UUID} or mountpoint ${SSD_DIR} already exists. Not modifying /etc/fstab."
  exit 1
fi

# append new mount entry to /etc/fstab
echo "UUID=${SSD_UUID} ${SSD_DIR} ext4 defaults,noatime,nodiratime,commit=60,errors=remount-ro 0 2" | sudo tee -a /etc/fstab > /dev/null

# mount the filesystem immediately
sudo systemctl daemon-reload
sudo mount "${SSD_DIR}"
Replace the following fields
Set SSD_DIR with your SSD mount directory (ex: /media/ssd)
Configure TRIM for SSD/eMMC Devices
eMMC and SSD storage have a limited number of write cycles. Without proper maintenance, excessive write operations can shorten their lifespan, potentially leading to data corruption or device failure. Enabling TRIM helps the operating system inform the storage device which blocks of data are no longer in use, allowing it to manage wear more efficiently and extend the device’s durability.
# enable systemd TRIM
sudo systemctl enable fstrim.timer
sudo systemctl start fstrim.timer

# see fstrim status
systemctl status fstrim.timer

# check last run time
systemctl list-timers | grep fstrim

# run manually
sudo fstrim --all -v
Optimize Filesystem and Memory Settings for SSD/eMMC Devices
These system tweaks are recommended to reduce unnecessary write operations on eMMC or SSD devices, extending their lifespan and improving performance:
- Suppress Access Time Updates: Adds
nodiratimeto reduce metadata writes for directory access. - Extend Commit Interval: Sets
commit=60to flush metadata changes every 60 seconds instead of more frequently.
# add nodiratime where noatime is present and nodiratime is missing (ext4 only)
sudo sed -i -E '/[[:space:]]ext4[[:space:]]/ {
  /noatime/ {
    /nodiratime/! s/noatime/noatime,nodiratime/
  }
}' /etc/fstab

# set commit=60 if commit= is present; otherwise add it (ext4 only)
sudo sed -i -E '/[[:space:]]ext4[[:space:]]/ {
  s/(^|,)commit=[0-9]+/\1commit=60/g
  /commit=60/! s/[[:space:]](defaults[^[:space:]]*)/\1,commit=60/
}' /etc/fstab

# mount the filesystem immediately
sudo mount -a
💾 Configure SWAP
Configure SWAP (zram + swapfile hybrid)
This configuration combines fast compressed RAM swap (zram) with a disk-based swapfile fallback:
- zram (1GB, high priority) → Used first, very fast, no disk wear.
- Swapfile (8GB, low priority) → Used only if memory pressure exceeds zram.
- Balanced swappiness (80) → Encourages kernel to prefer zram before reclaim pressure becomes critical.
- Overcommit enabled → Allows flexible memory allocation (common on SBC systems).
This setup provides: - Better responsiveness than disk-only swap - Reduced SSD/eMMC wear - Safer behavior under heavy memory usage
# ------------------------------------------------------------------
# Stop SWAP cleanly (so priorities can be applied deterministically)
# ------------------------------------------------------------------
sudo swapoff -a
sudo systemctl stop armbian-zram-config.service

# ------------------------------------------------------------------
# Configure Armbian zram (~1GB on 4GB RAM via 25%) and enable at boot
# Note: Armbian sets zram priority (often 5). We keep swapfile below it.
# ------------------------------------------------------------------
CONFIG="/etc/default/armbian-zram-config"
update_var() {
  VAR="$1"
  VALUE="$2"
  if grep -qE "^[# ]*${VAR}=" "$CONFIG"; then
    sudo sed -i -E "s|^[# ]*${VAR}=.*|${VAR}=${VALUE}|" "$CONFIG"
  else
    echo "${VAR}=${VALUE}" | sudo tee -a "$CONFIG" > /dev/null
  fi
}
update_var ENABLED true
update_var SWAP true
update_var ZRAM_PERCENTAGE 25
update_var MEM_LIMIT_PERCENTAGE 50
update_var SWAP_ALGORITHM lz4
update_var ZRAM_MAX_DEVICES 1
sudo systemctl enable armbian-zram-config.service
sudo systemctl restart armbian-zram-config.service

# ------------------------------------------------------------------
# Create 8GB swapfile as LOW priority fallback (0)
# ------------------------------------------------------------------
if [ ! -f /var/swapfile ]; then
  sudo fallocate -l 8G /var/swapfile                  # create a new swapfile
  sudo chmod 600 /var/swapfile                        # set correct permissions
  sudo mkswap /var/swapfile                           # make it a swap area
fi

# ------------------------------------------------------------------
# Persist swapfile across reboots (add or update fstab entry)
# ------------------------------------------------------------------
if grep -qE '^/var/swapfile[[:space:]]' /etc/fstab; then
  sudo sed -i -E 's|^/var/swapfile[[:space:]].*|/var/swapfile none swap sw,pri=0 0 0|' /etc/fstab
else
  echo '/var/swapfile none swap sw,pri=0 0 0' | sudo tee -a /etc/fstab > /dev/null
fi

# ------------------------------------------------------------------
# Enable swapfile now with the configured priority
# ------------------------------------------------------------------
sudo swapon -p 0 /var/swapfile 2>/dev/null || true

# ------------------------------------------------------------------
# Tune memory behavior
# ------------------------------------------------------------------
# encourage earlier swap usage (zram first because higher priority)
sudo sed -i -E 's/^[[:space:]]*vm\.swappiness[[:space:]]*=/# &/' /etc/sysctl.conf 2>/dev/null || true
sudo sed -i -E 's/^[[:space:]]*vm\.swappiness[[:space:]]*=/# &/' /etc/sysctl.d/99-sysctl.conf 2>/dev/null || true
echo "vm.swappiness=80" | sudo tee /etc/sysctl.d/99-swappiness.conf > /dev/null

# allow flexible memory allocations (common on SBCs)
echo "vm.overcommit_memory=1" | sudo tee /etc/sysctl.d/99-overcommit.conf > /dev/null

# reload sysctl configs
sudo sysctl --system

# ------------------------------------------------------------------
# Verify final configuration
# ------------------------------------------------------------------
sudo swapon --show